2 Ways: How to Hide Files and Folders on A USB Drive in Windows
We often use USB Drives to store files, transfer data, and backup. Because of its small size, large memory space, and easy portability, USB Drives are widely used. However, USB Drives can be misplaced, stolen or lost. It is necessary to hide or lock the data on the USB Drive. For example, if you accidentally lose your USB Drive, but the important data inside is not protected by any means, and then anyone can easily view, copy, change, delete or even leak the data on the USB Drive. If you want to make files and folders stored on USB Drive hidden and invisible, you can try to hide files on USB Drive by using command line, or use professional USB drive encryption software to hide or lock files/files on USB drive to keep your data safe.
Method 1: Hide USB Drive Folders Using Folder Hidden Software
USB Drive Folder Hidden Software has the ability to hide files and folders from internal hard drives, external hard drives, USB drives, Thumb Drives, Memory Sticks, Memory Cards, SD Card, Pen Drives, Jump Drives and other external storage drives. USB drive folder hidden software supports all popular brands of USB drives, such as Samsung, SanDisk, Kingston, PNY, Corsair and Kingston.
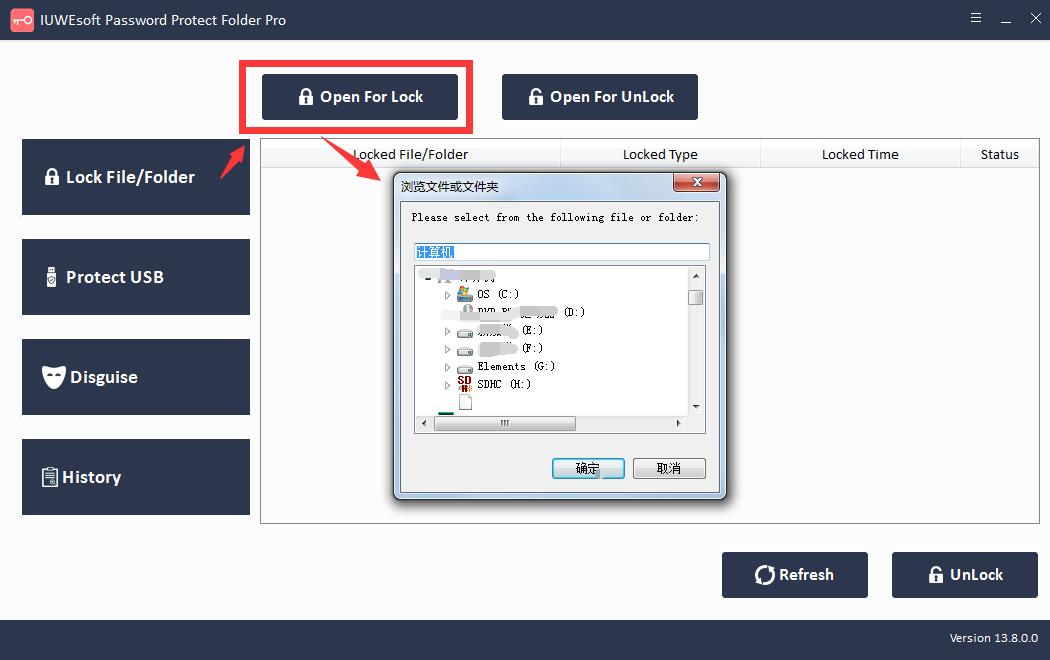
Step 1: Download, install and launch the best USB Drive File Hidden Software - IUWEsoft Password Protect Folder Pro. Click "Lock File/Folder", and then click "Open for Lock" button to select a file or folder from USB Drive.

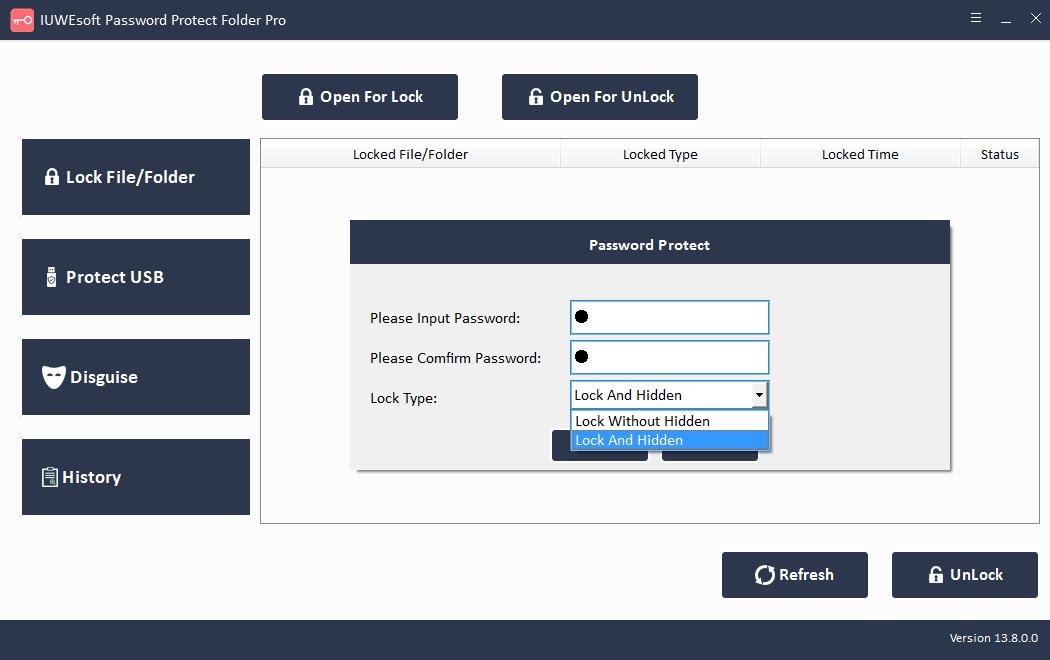
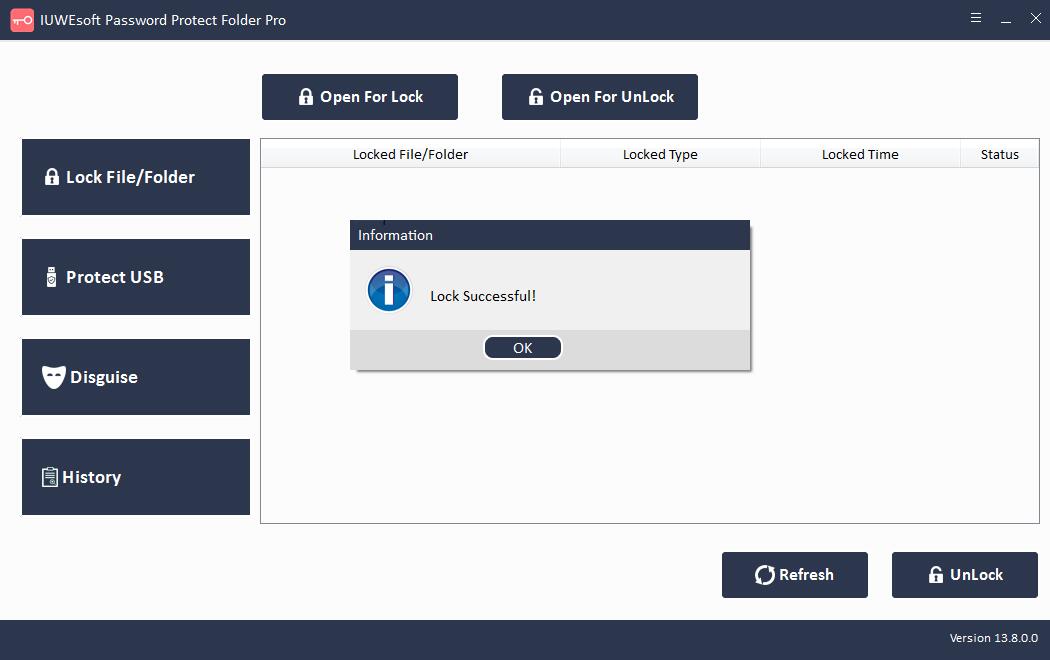
Step 2: Select USB Drive Folder lock type (Lock USB Drive Folder with Hidden), input and confirm password and then click Lock button.
Step 3: Unhide Folders on A USB Drive: Select locked file or folder in the main interface and then click "Unlock" button, input password to unlock file/folder.


Method 2: Hide USB Drive Folders Using Command Line
How to Hide one folder or file on USB Drive
Step 1: Search for Command Prompt in the search box. Press "Windows + R" on your keyboard to open the dialog. Type CMD and press OK.
Step 2: Enter the USB drive letter and press Enter. If you're not sure what your drive is, you can go to "This PC" to check the drive letter.
Step 3: Change the folder name on the USB.
Remove name gaps, such as changing "New Folder" to "New-Folder".
Step 4: Type the command line and press Enter.
Attrib (folder name, like "new-folder".) +s +h

Step 5: Open the USB and you can see your folder is hidden.
Note: If you want to hide the image, repeat step 1 to 4, you need to enter the image extension after the image name, the command line input is "attrib image.jpg" +s +h ". If you are not sure how to check the extension, right click on the image, then click Properties in the drop-down list. View File Extensions on File Types.

How to hide folders on USB Drive
Please repeat steps 1 to 3 and enter a command line, such as: attrib +s +h +a *.* /s /d. Press "Enter" to continue. And then, open your USB drive and you can see that all folders are hidden.
How to View Hidden Folders on USB Drive
Step 1: Press Windows + R shortcut key to open a dialog box and type CMD to start.
Step 2: Type the USB drive letter and press Enter key.
Step 3: Type command line and press Enter.
Attrib * -s -h (* stands for your Hidden folder's name).

Step 4: Open your USB drive and check if your folder is visible.