7 Ways: Protect PowerPoint Presentation from Being Copied/Edited
Microsoft PowerPoint can help users create efficient presentations. PowerPoint is used in various fields to save important and sensitive information. Therefore, locking PowerPoint presentations can become a necessity. You might want to protect your entire presentation from editing to prevent accidental changes that could interfere with your presentation, or you might just want to lock a single slide with critical information from editing. Unless you protect the PowerPoint document, anyone with access to the PPT file can open, copy, and edit the content. In this article, we will share with you seven methods on how to protect/lock PowerPoint presentations.
Method 1: Using PowerPoint Presentation File Protection Tool
Third-party Presentation locking software like IUWEsoft Password Protect Folder Pro allows you to lock, protect, hide and disguise PowerPoint Presentation files from local hard disks and external hard drives. It ensures that only the person with the password can view the PowerPoint file.
2 Steps to Protect PowerPoint Presentation from Being Copied or Edited
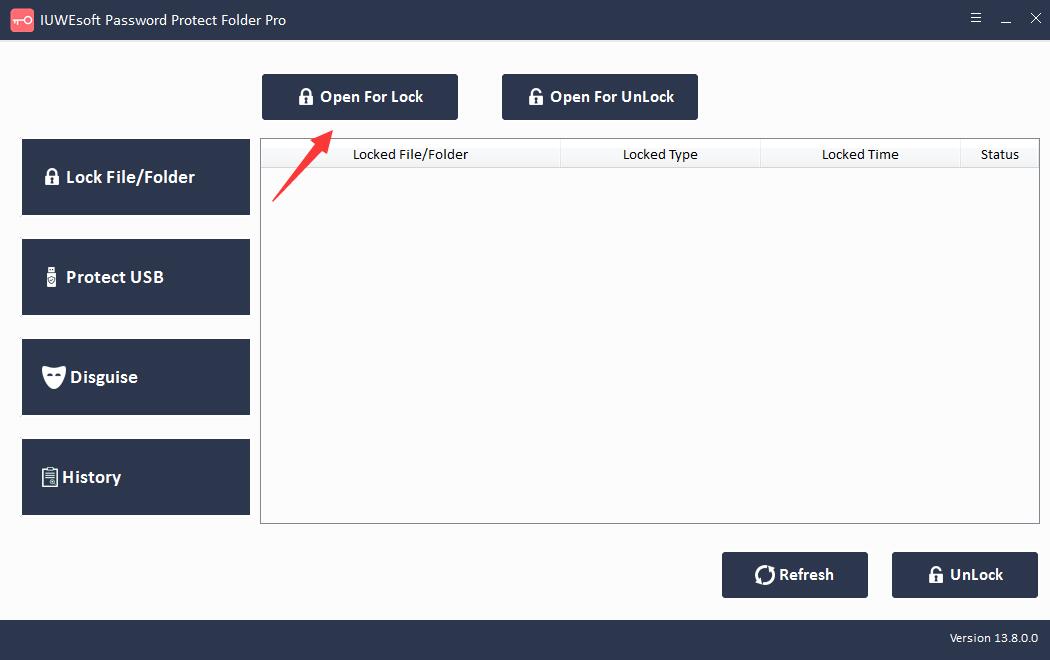
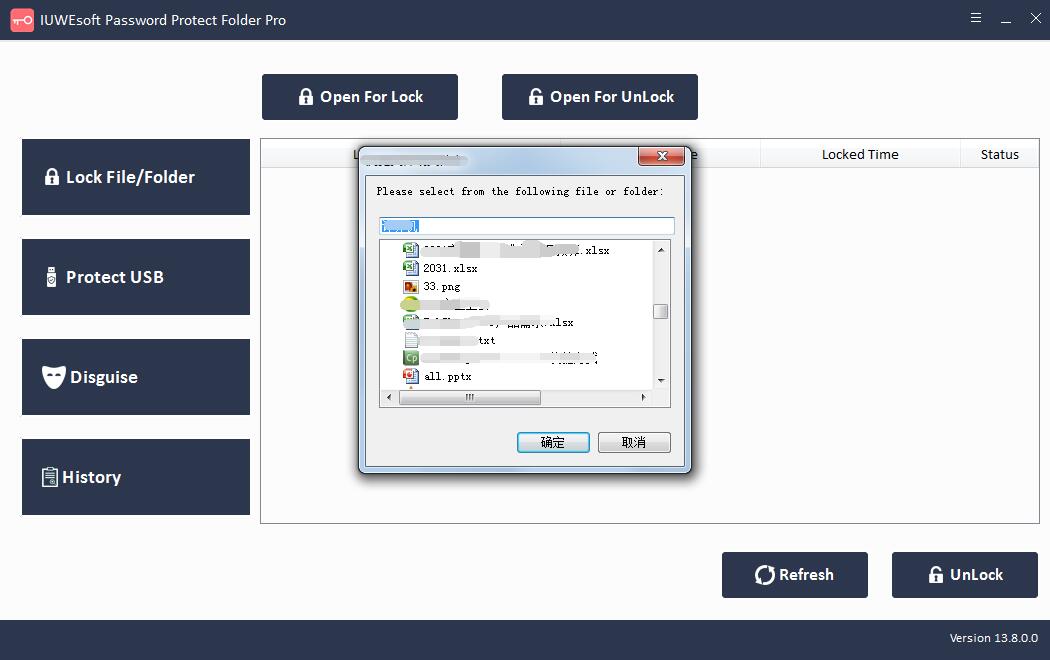
Step 1: Download, install and launch the PowerPoint Presentation file lock software - IUWEsoft Password Protect Folder Pro. Click "Lock File/Folder", and then click "Open for Lock" button to select a PPT file or PPT folder from computer or USB drive.
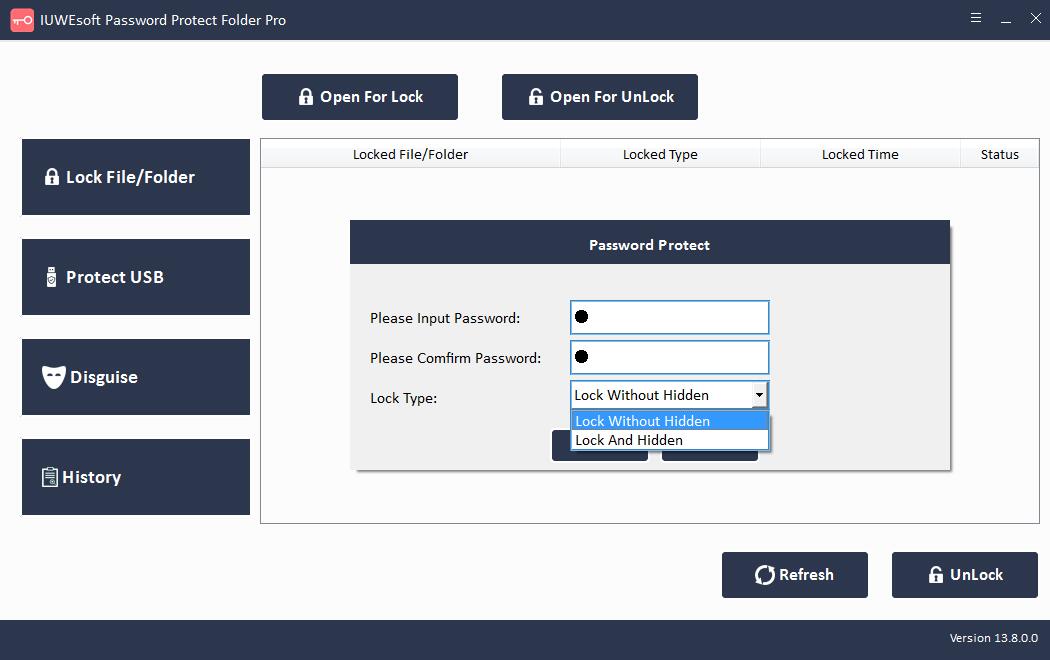
Step 2: Select PPT lock type (Lock PPT file without Hidden or Lock PPT file with Hidden), input and confirm password and then click Lock button to password protect PowerPoint Presentation.
Method 2: Add Watermark to Copyright PowerPoint Presentation
To prevent your PowerPoint presentation from being copied, you can add a watermark to protect your slides.
Step 1: Open a PowerPoint presentation.
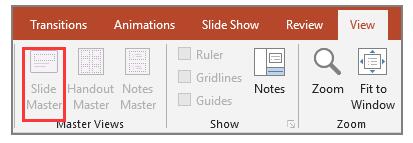
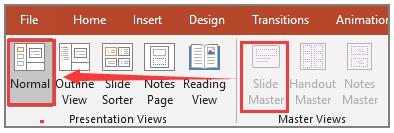
Step 2: Click the View tab on the Ribbon to go to "Slide Master".
Step 3: If you want to insert a watermark on all slides, select the first parent slide to start. If it is a single slide, skip the parent slide and select the selected single slide.
Step 4: Click the "Insert" tab in the ribbon.
Step 5: Click the "Text Box" in the text section.
After the text box appears, fill in the watermark information.
If you want to change the format of the watermark shape, go to the Format tab on the main ribbon in PowerPoint.
Go to the Format tab, click Send Backwards, and select Send Backwards.
Step 6: Go to the View tab and click Normal to return to the normal PowerPoint view.
Method 3: Restrict PowerPoint Presentation Access
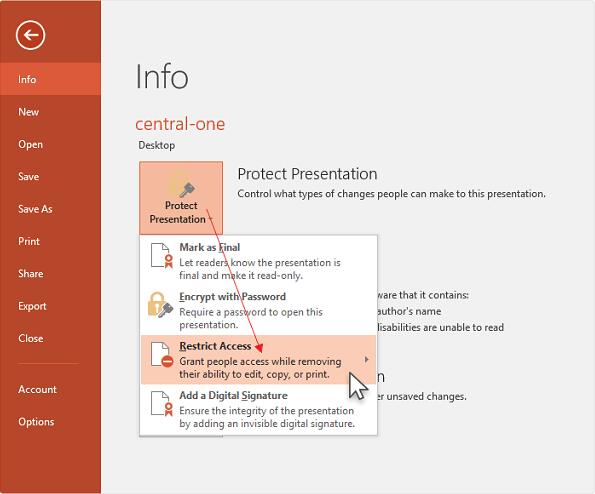
Step 1: Go to File tab > Info.
Step 2: Choose Protect Presentation and then click Restrict Access from the drop-down menu.
Method 4: Encrypt PowerPoint Presentation with Password
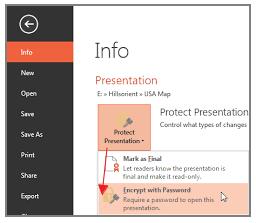
Step 1: Choose File tab > Info.
Step 2: Click Protection Presentation and then click Encrypt with Password.
Step 3: Type the password and click OK.
Step 4: Enter the password again to confirm.
Method 5: Mark PowerPoint Presentation as Final
To prevent your PowerPoint Presentation files from editing, Mark as Final is a good option to mark the files as the final version and make PowerPoint read-only.
Step 1: Click the File tab on the PowerPoint ribbon.
Step 2: Choose Info on the left panel, you can see the Protect Presentation part on the right side.
Step 3: Click Protect Presentation and choose Mark as Final.

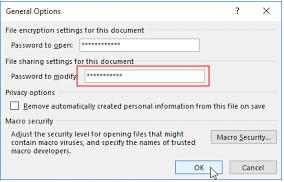
Method 6: Set Modify Password for PowerPoint Presentation
Modify Password can prevent others from editing PowerPoint Presentations.
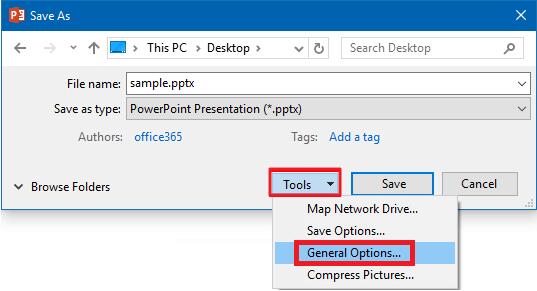
Step 1: Go to File > Save as.
Step 2: Click "Tools" on the bottom. Click "General Options".
Step 3: Go to "File sharing settings for this document", type your password for modifying.
Method 7: Convert PowerPoint to Image/PDF/Video File
The final way to protect your PowerPoint presentation against editing is to convert it to a picture, PDF or video format so that it cannot be edited. Example: How to convert PowerPoint to image format.
Step 1: Open the File tab and select "Save as" on the left corner.
Step 2: Select image format (PNG/JPEG) from "Save as type" drop-down list and then click "Save" button.
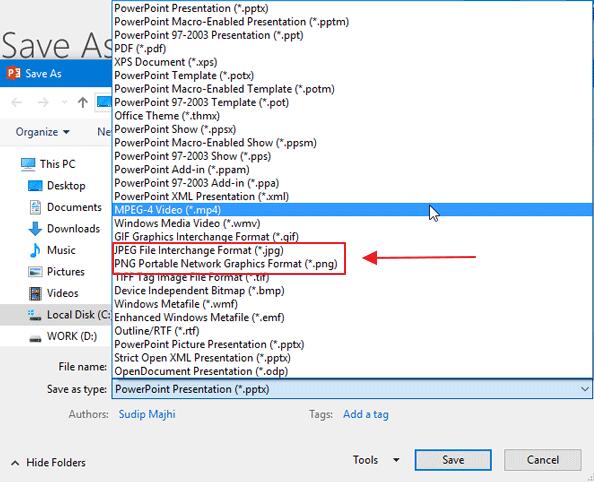
Step 3: It will ask you whether you want to export all slides or the current slide. Choose Every Slide and click OK.